
MARINE SEDIMENT KIT – PRESERVATION BUFFER
For use in all countries, unless you are sampling mangrove or estuarine sediment, in which case this kit can be used only in the UK and EU. If sampling mangrove or estuarine sediment outside of the UK and EU, due to our import license requirements, you will instead receive a modified soil kit. This is a very similar kit and will include a scoop for collecting sediment samples. For additional instructions on working with this modified kit, please see the section Mangrove or Estuarine Sediment Outside the UK and EU at the bottom of this page.
- All kit users must familiarize themselves with data requirements set out in the Sample Manifest, prior to sampling.
- Please ensure all information sent to NatureMetrics is in English.
- Datasheets must be completed using a pencil only.
- Kits should be used within one year.
Kit contents
1x pair of nitrile gloves
1 x 25ml scoop in snaplock bag
1 x barcoded 125 mL sample pot
1 x 50 mL tube of “RNA preservation buffer”
1 x sampling datasheet
Vampire Pump
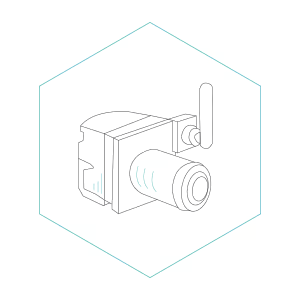
1 x pump head (A)
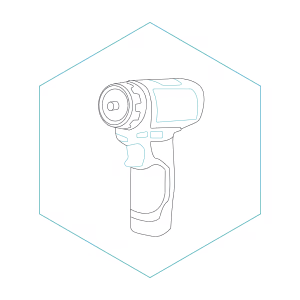
1 x drive unit (B)
YOU WILL NEED
- Device to capture GPS coordinates (lat / long) (e.g. GPS capable smartphone or standalone GPS device)
- Permanent marker (for labelling the sample pots)
- Pencil (to complete the datasheet)
- Disinfectant wipe (to wipe down any reusable tools, such as scoops or spoons – to minimize contamination)
PRE-SAMPLING
THINGS TO KEEP IN MIND WHEN SAMPLING SEDIMENTS:
To obtain a better representation of the sediment community, it is important to combine four subsamples into one composite sample. Each 10mL scoop represents a single subsample. Thus, 4 x 10mL subsamples (approximately 40g in total) will comprise a full sample. We cannot accept samples larger than 50g – do not exceed x4 sediment scoops per sample
Important:
- One sediment sample = x4 full scoops (the scoop in the kit is used to collect each scoop).
Use a new kit for each new sample. This kit is designed to take one composite sample (not exceeding 50g) consisting of multiple subsample scoops. The barcodes on the sample pot and the sampling datasheet within each kit match, please do not mix and match between kits.
Grab or core should be intact and the surface sediment should not be disturbed. We recommend taking another grab or core if the surface sediment is not intact, particularly if you are trying to sample the top layer of the sediment. Collect sediment samples from greater than 2 cm from the edge of the grab or core device to minimize contamination.
Use of chemicals The provided preservation buffer is non-hazardous and has no special storage or shipping requirements. Gloves should be worn when handling. If the product is splashed on skin or in eyes then the affected area should be rinsed with water. See provided Safety Data Sheet for further details.
More than one person using the kit? Please purchase extra gloves.
To minimize waste we provide one pair of gloves per kit. If two or more people will be handling the contents of the kit and collecting an eDNA sample, you will need to purchase additional pairs of gloves – enough for one pair of gloves for each individual handling the kit. We recommend purchasing medical-grade nitrile gloves.
TIPS FOR GETTING THE BEST RESULTS
Avoiding Inconclusive Results:
To get the best results possible, to avoid inconclusive results, and to avoid situations where data cannot be reported from a sample, please read our HOW TO AVOID INCONCLUSIVE RESULTS guide before undertaking fieldwork.
In summary, when inconclusive results occur, it is because the target DNA was not detected, DNA was degraded, or PCR (a crucial part of the lab process) was inhibited.
Key steps you can take to help avoid inconclusive results: do not leave your samples exposed to sunlight or heat, and return samples to NatureMetrics as soon as possible after sampling.
Avoiding Contamination:
To increase confidence in results, avoiding contamination of samples is highly important. Sealed kits are sterile until opened; do not open more than one kit bag at a time, keep kit contents inside the bag before use, and put on the provided gloves before touching other kit components. Whilst wearing gloves, avoid touching anything not necessary to sample collection to minimize introducing external DNA into the sample. Change gloves between each kit. If any reusable tools are used, these should be decontaminated, using a disinfectant wipe or a bleach solution, between each sample.
PROTOCOL
1. Using a permanent marker, label the sample pot with your unique sample ID.
2. Put on provided gloves to minimize cross contamination and introducing your own DNA into the sample.
3. Remove the sampling scoop from the bag. Do not dispose of this bag because your sample pot will go into this.
4. Remove any flora, fauna, or debris from the surface where you intend to collect the subsamples. This can be done with a gloved hand.
5. Take a sediment using the scoop, a twisting action can help in sticky sediments.
6. Empty the sediment sample into the pot. Replace the lid of the pot between subsamples to prevent contamination. A gloved finger can be used to help empty the sediment from the scoop into the pot if required.
7. Repeat steps 4-6 at different locations within the sediment grab, using the same scoop, until you have collected four subsamples. x4 scoops = x1 sample. Do not exceed four cores.
8. When all the subsamples have been collected in the pot, pour all of the preservation buffer into the sample pot. Firmly secure the lid on the sample pot and shake to mix the sediment and preservation buffer together.
9. Place the sample pot into the plastic snap lock bag that originally held the scoop. Push out excess air then seal the bag. This is to contain any leakage of liquid during travel.
10. Complete the sampling datasheet with a pencil (do not use pen as ink can easily run, to the point where it becomes unreadable).
Complete the sample manifest, which was attached to the email confirming shipping of your kits. Make sure that the unique sample IDs entered into the sample manifest exactly match what you have written on the sample bag. Please record your sampling data on paper and on the sample manifest so there is a physical and electronic copy of your data.
Upload your sample manifest using our Customer Service Desk.
11. Place all the sampling datasheets together into a leftover plastic kit bag and package in a box with the sample pots. To minimize the chance of leakage, sample pots should be stored upright and packed in a way that allows for minimal movement of pots during sample transport. Prior to shipping, samples should be kept in the dark to prevent exposure to sunlight. Samples can be stored at room temperature, however, if they will be stored for more than two weeks prior to shipping it is recommended that they be stored in a freezer (cold chain transport to NatureMetrics is not necessary).
12. For sample returns, visit our customer support desk here. Use the Logistics Request form to upload your completed sample manifest and book your sample return. NatureMetrics is fully compliant with current legislation on the transport of biological material and our operations team are on hand to ensure that all return shipments meet the required specification. We are only able to analyze samples that are returned using the correct NatureMetrics logistics procedure.
Mangrove or Estuarine Sediment Outside the UK and EU
When sampling mangrove or estuarine sediment outside the UK and EU, due to our import license requirements, you will instead receive a modified soil kit. This is a very similar kit and will include a scoop for collecting sediment samples. Please note, the kit will be labelled as a soil kit.
Your modified kit will not contain a datasheet (as detailed in the protocol above). Instead, please familiarize yourself with your sample manifest and ensure you collect all the necessary data when taking your samples, so the manifest can be completed in full.
In is important that your samples are packed and shipped in accordance with our Soils Packing and Transport Instructions to ensure clearance through UK customs. Each sample pot will need to be sealed within a safety specimen bag (provided in the kit) prior to shipping.
Disclaimer: Safe sample collection is the responsibility of the Client. NatureMetrics accepts no liability associated with the use of the kits and sample collection. The Client is solely responsible for the quality of the samples and the representativeness of the samples received by NatureMetrics. The information contained within the Final Report provided by NatureMetrics to the Client is not intended to be advisory, it is informational. Interpretation and decisions are the sole responsibility of the Client. NatureMetrics does not accept any liability whatsoever for any reliance placed on any information contained within, or any use that may be made of, the Final Report by the Client. Please read the full limitation of liability statement in the Terms and Conditions.
Health & Safety information for this kit can be viewed here.
